Writing Code for the RG35XX H
Getting the most out of this device means we're going to have to get down and dirty. Last time we were in the land of the RG35XX H we were able to get root on the device and enable SSH. This time we want to start figuring out some of the stock menu features and implementing them ourselves, ideally in Go. Nothing against C, but Go is a higher-level language with many modern features and modern libraries that will be much nicer to work with when building software to replace the stock menu. I'm not an expert in Go so this will be a great learning opportunity as well.
So what is the menu?
Let's dive in.
The menu is what the device will boot into automatically. I showed off what it looks like last time, but here's a refresher:
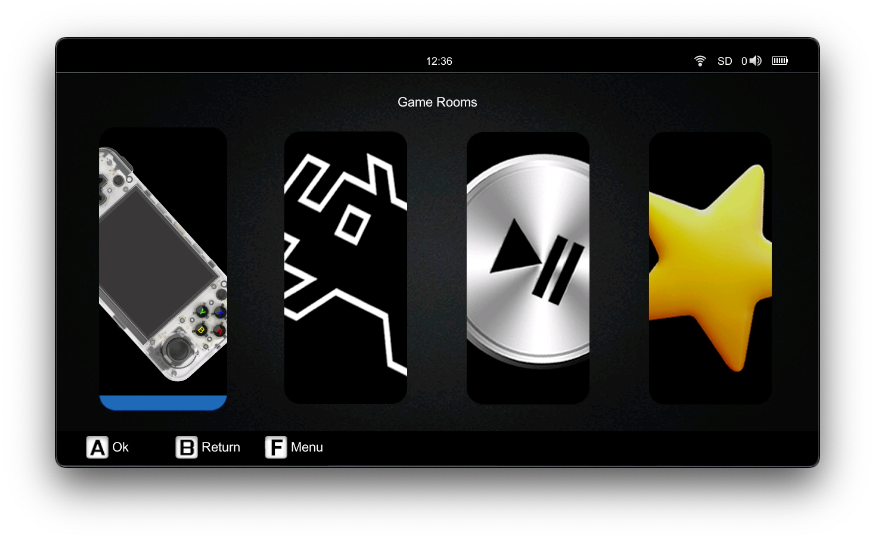
It's pretty basic, but has all the functionality it needs. The organization is a little questionable, but hey, it works.
So that's what it looks like, but what exactly is it? What binary is running? Figuring this out seems like it will be the key to understanding the device. We only have so many vendor-supplied binaries that take advantage of the hardware so we have will have dissect them carefully. Luckily we have root and SSH, so let's see what we can see.
My favorite process monitoring utility has got to be htop (of course I'm happy to receive new suggestions!). Let's see what it shows:
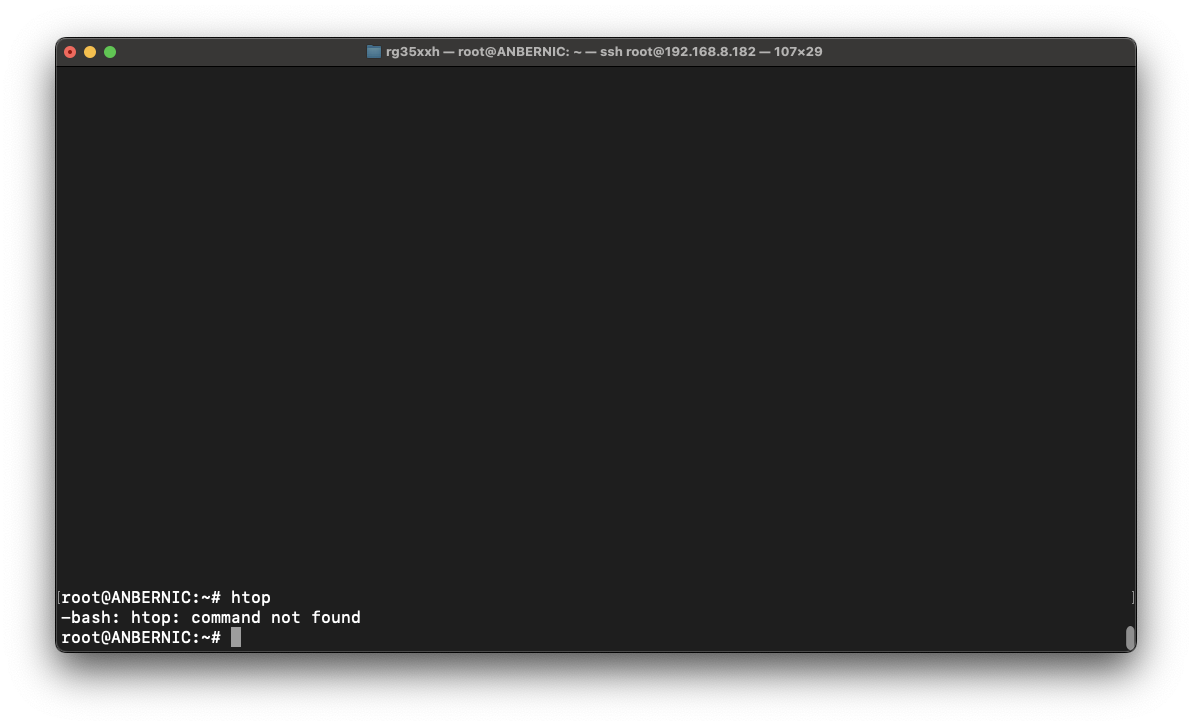
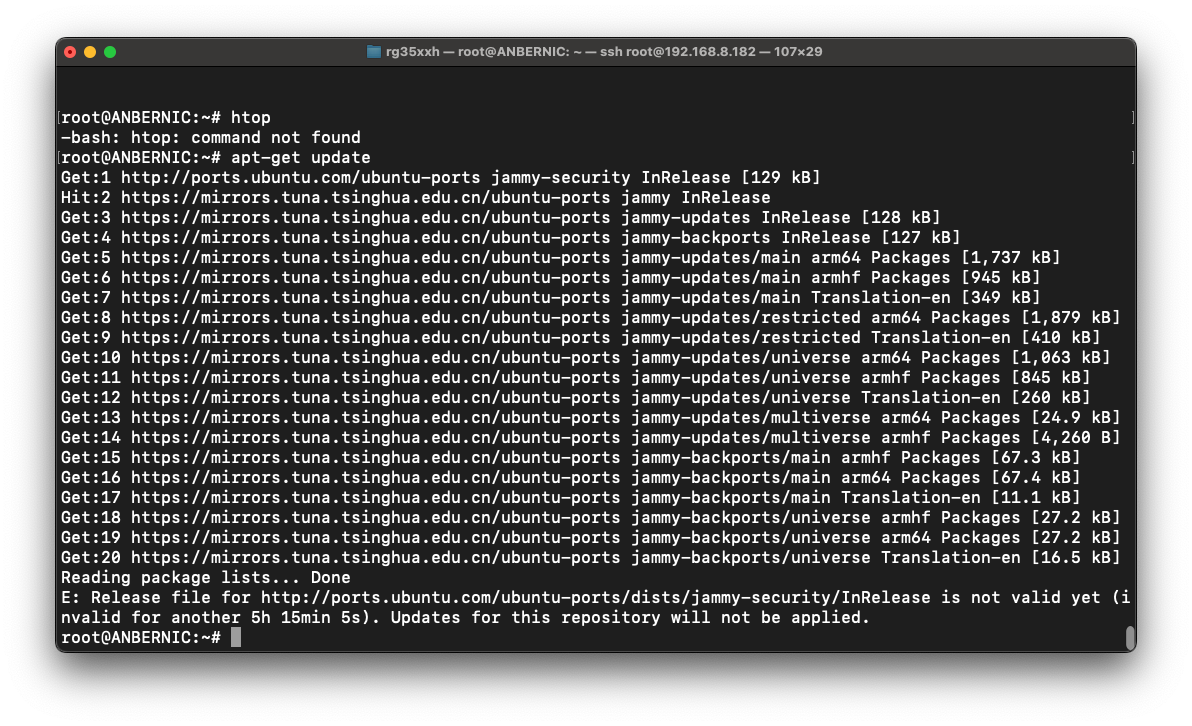
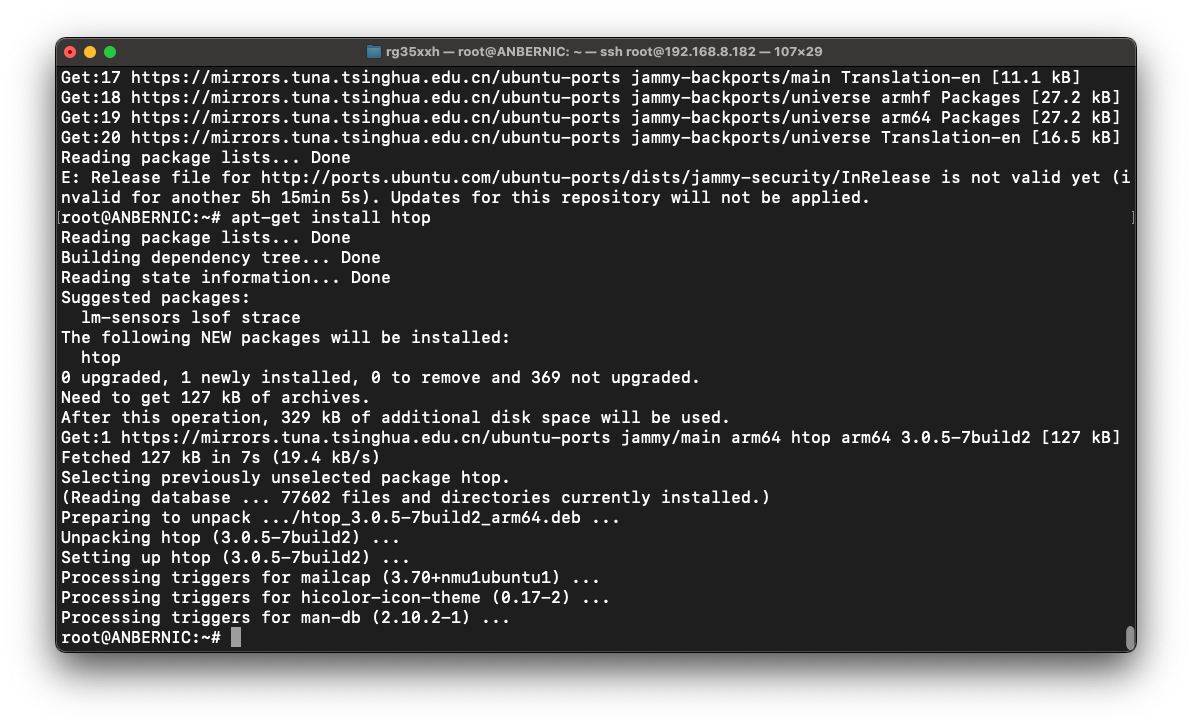
Ah, I guess htop is not installed by default. Let's update and install.
So if you run htop you will get an updating list of running processes, and a view of CPU and RAM usage. If you scroll through the list you'll notice there really aren't many processes here. Now, we can press the T key to get a "tree" view. This will show us a hierarchical view with each child process being a leaf from a parent process. Using this, we can see which process the menu is by viewing the children of the /init process. /init is used as the root process in Debian-based systems, of which Ubuntu is one.
I like to load up the file manager while SSH'd in to avoid accidental sleep mode activations. So in my screenshot here you can see exactly how the file manager was executed.
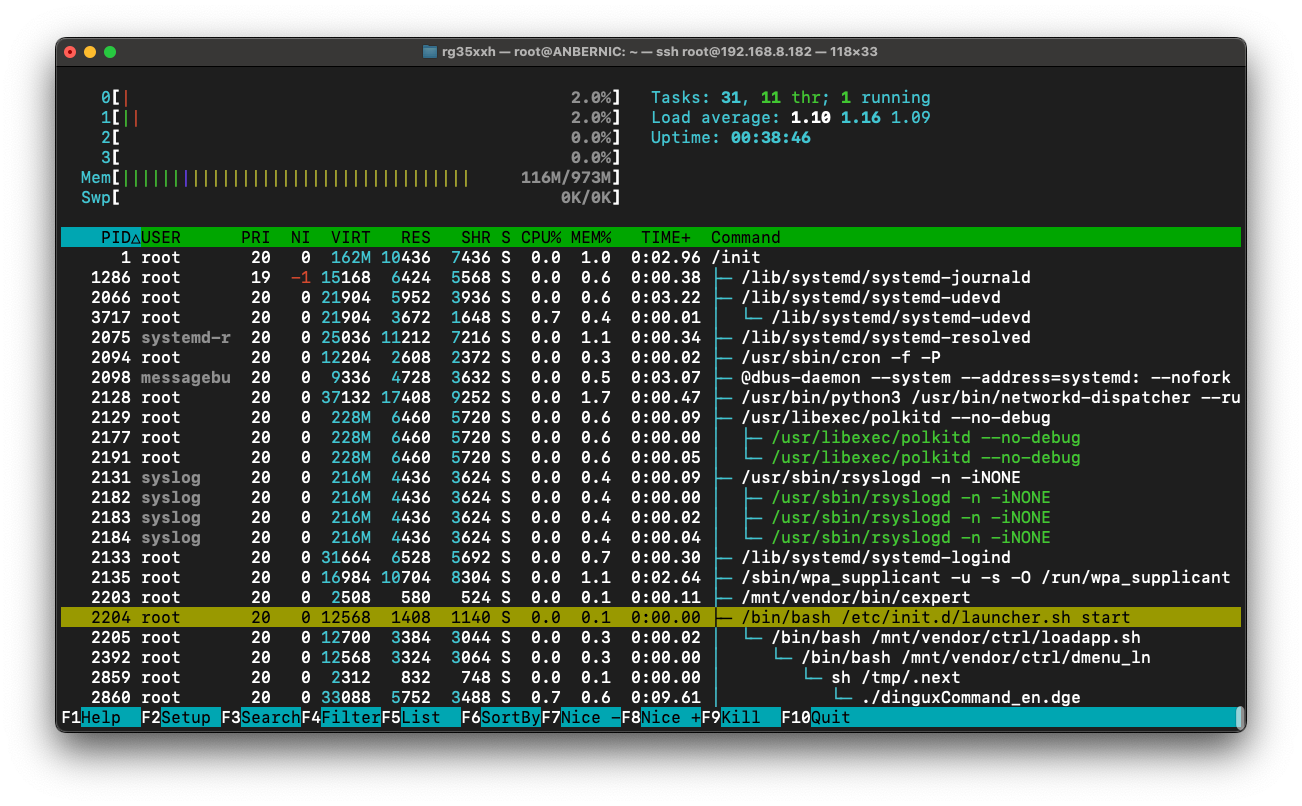
So just from this output we have some next steps for our investigation. We can see that /init will execute /etc/init.d/launcher.sh which will execute /mnt/vendor/ctrl/loadapp.sh which will execute /mnt/vendor/ctrl/dmenu_ln and so on.
Well, we're root and have ssh so, let's just take a look at those files, starting with /etc/init.d/launcher.sh.
Okay, so this is just some shell script that kicks things off. It even mounts an additional partition for functionality. Maybe trying to hide it, who knows. Interestingly, it checks for a BACKLIGHTCTR binary and tries to set it to run in the background, but it looks like the RG35XX H does not ship with such a binary. We'll fix that.
Okay, so nothing interesting here really, let's check out the next link in the chain, /mnt/vendor/ctrl/loadapp.sh.
Definitely more meat on the bone here, but nothing we actually care about right now. We want to get to the menu! It looks like this just sets up the system, and even does special things when charging it looks like. Something to dig into later, but not yet! It eventually lands in a loop that repeatedly runs the /mnt/vendor/ctrl/dmenu_ln binary. Seems like we might be getting close. Let's open up dmenu_ln.
So we see a few things here. We see the /tmp/.next that we saw when tracing the execution of the file manager. That's interesting. We also see debug configurations that allow loading apps from the SD card when placed in the proper location. Without any debug files though it eventually launches /mnt/vendor/bin/dmenu.bin. Okay, let's go there now, then!
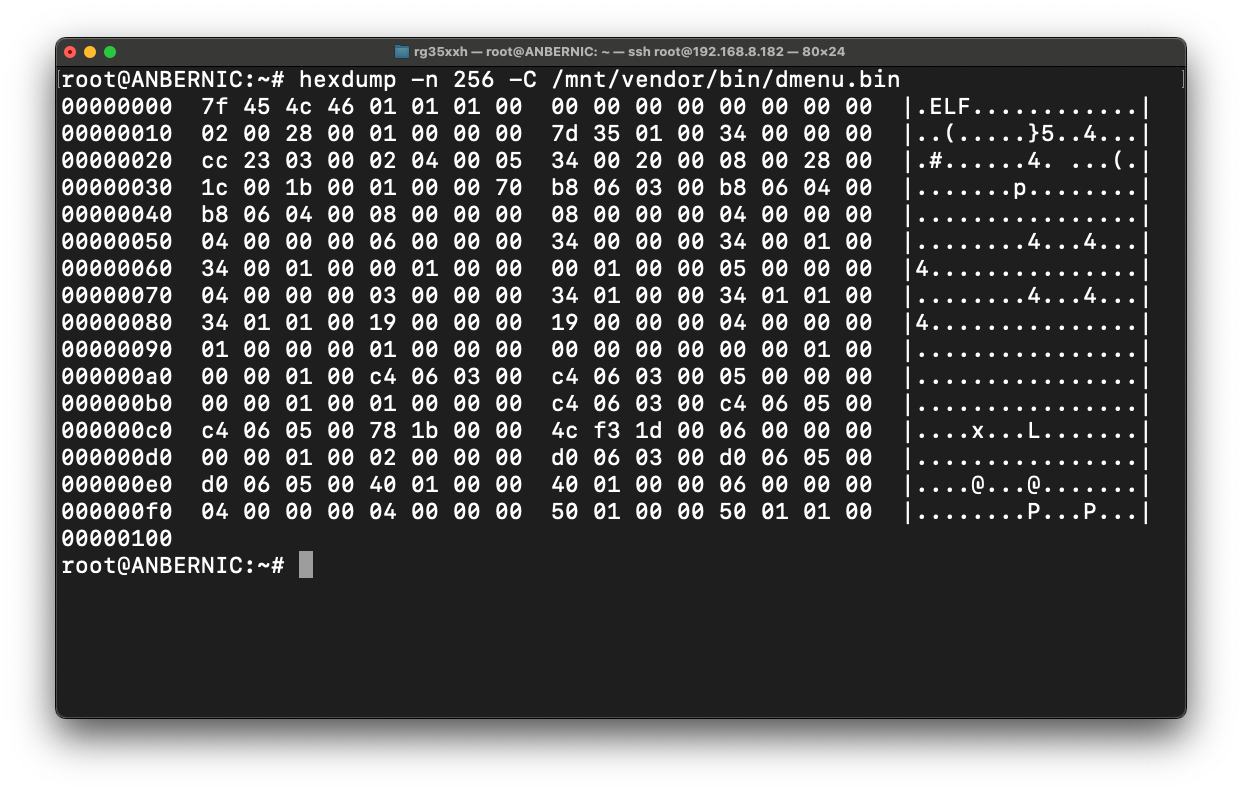
Finally! An actual binary! Okay, I think we found the actual menu. How can we be sure? Well, the file manager actually includes functionality to execute binaries. Let's try it.
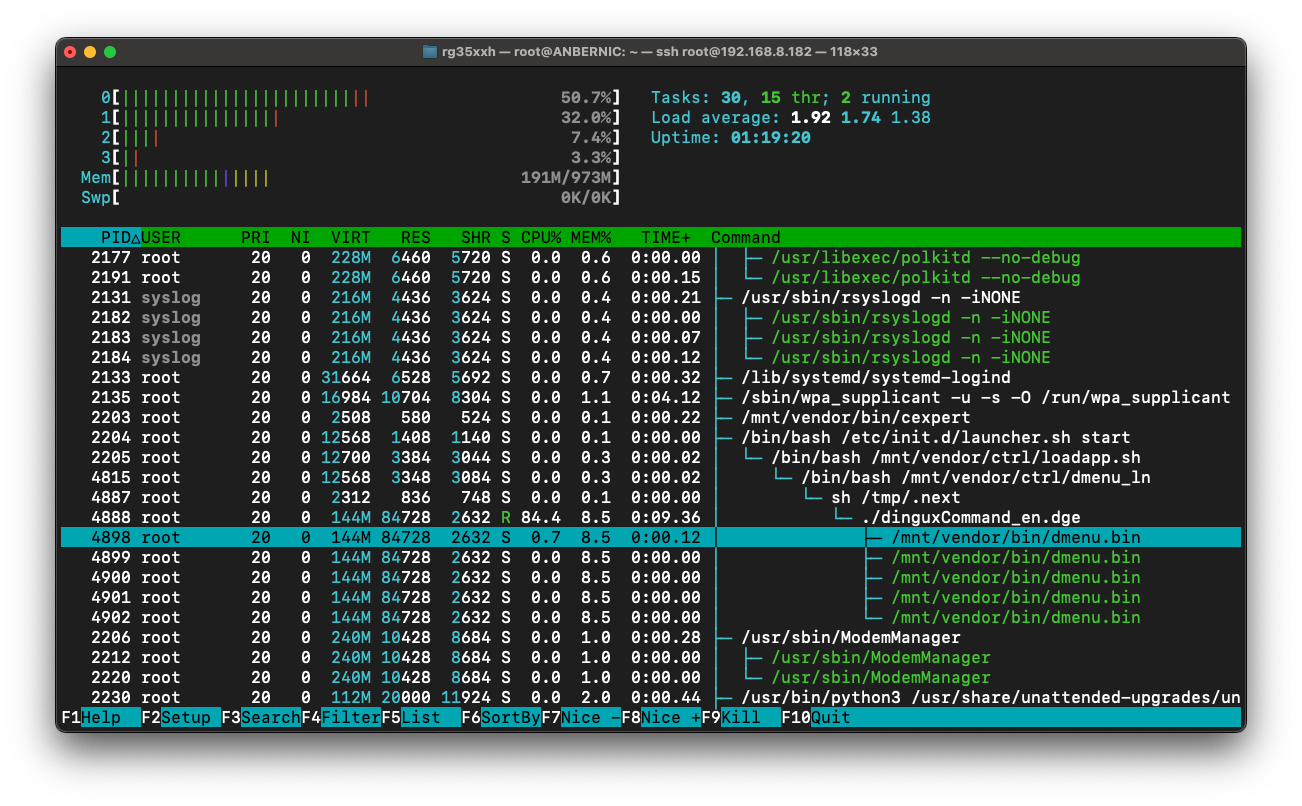
It executed. We were dropped back to the menu, and in htop we see that it is now a child of the file manager. Okay, great! We found it. I tried running the file manager again from within this menu, but it kicked back to the actual menu. No worries, we found the menu.
We Found the Menu Binary!
Okay, so? Why do we care?
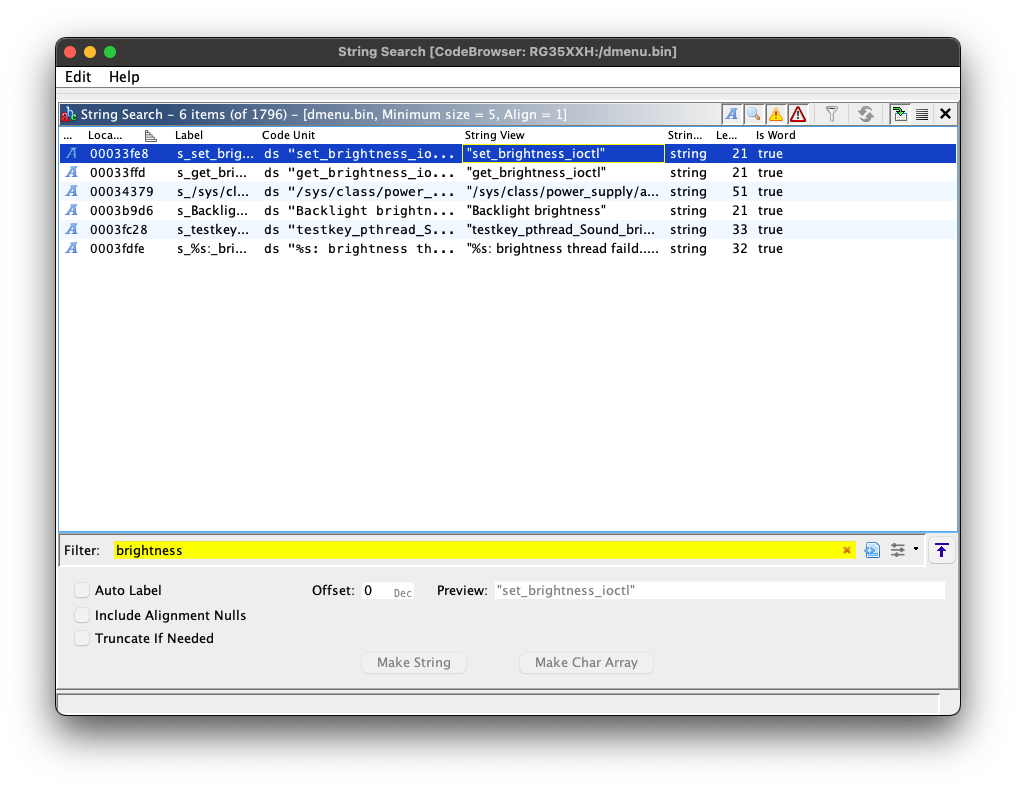
Yes, I hear you wondering. Like I mentioned, we only have a few binaries from the factory developers. These have the best chance of unlocking any hardware secrets. For instance the brightness control. As we saw earlier this system even tries to start a brightness control manager in the background, but it is not shipped with one. Let's fix that. It seems like a good entry point into reverse engineering this device.
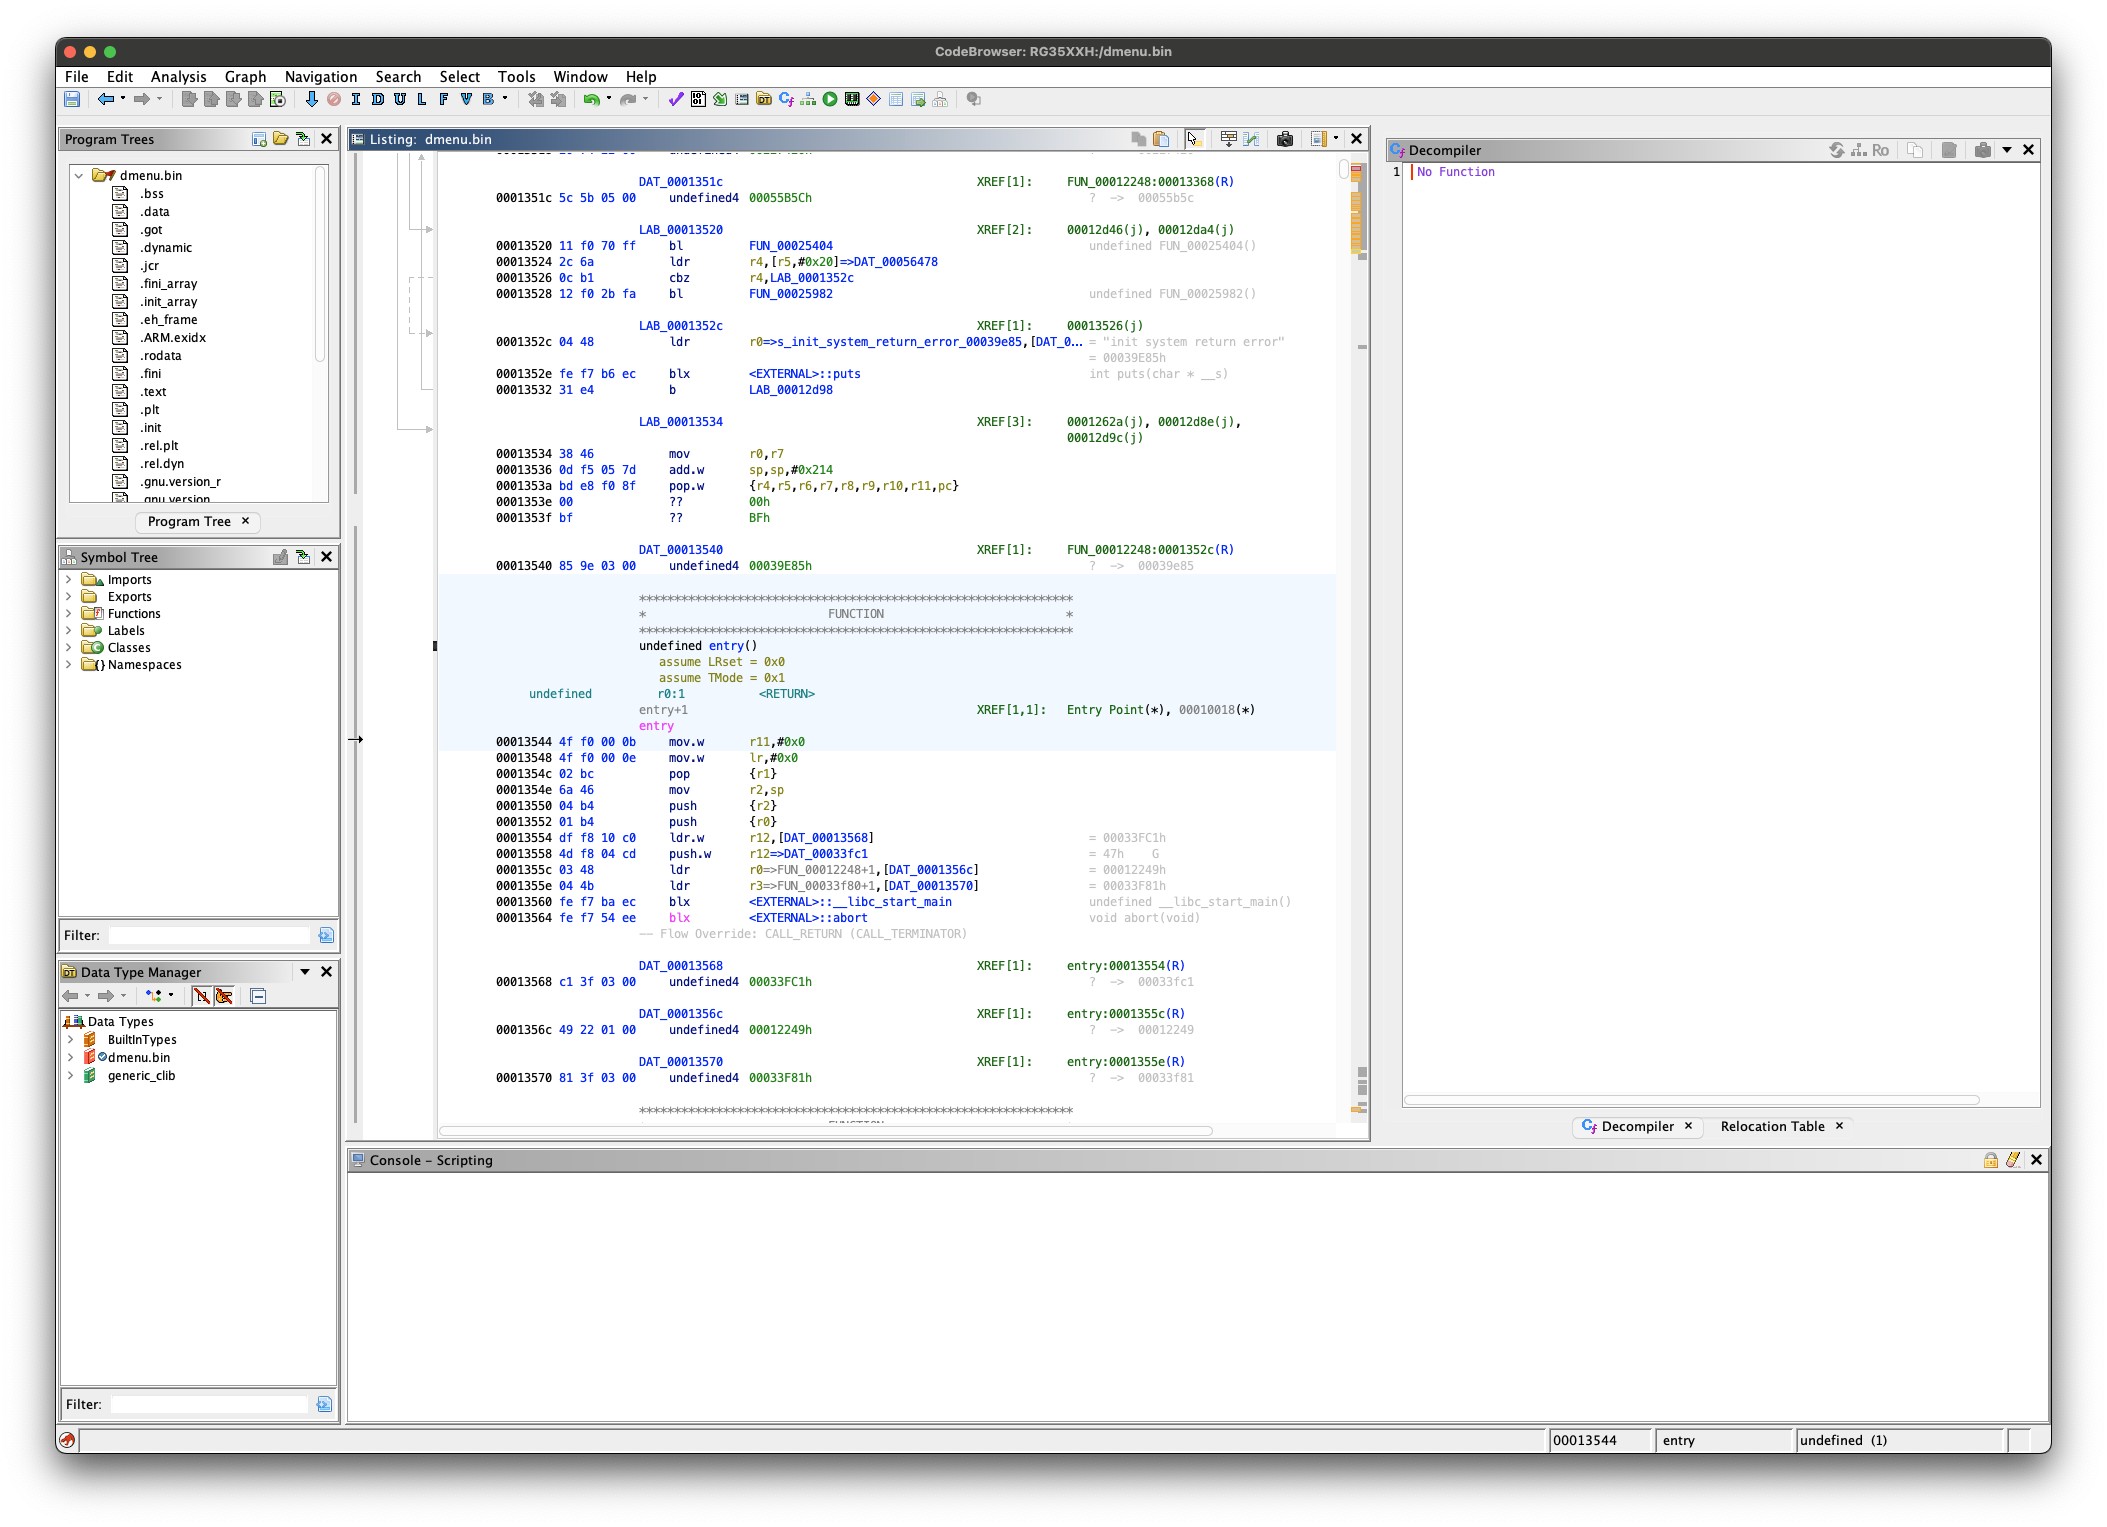
Okay, time to dig a bit deeper. Let's crack open the menu binary and see what we can find. Back in my day we would have used OllyDbg (plus who knows how many plugins). Nowadays the NSA has released Ghidra, and I've been itching to try it out. So let's do that!
Building a Backlight Controller
Why not?
First thing's first: why? Well honestly I've poked around a little bit at this point and found a piece of code that seems to handle this. Let me show you what that looks like.
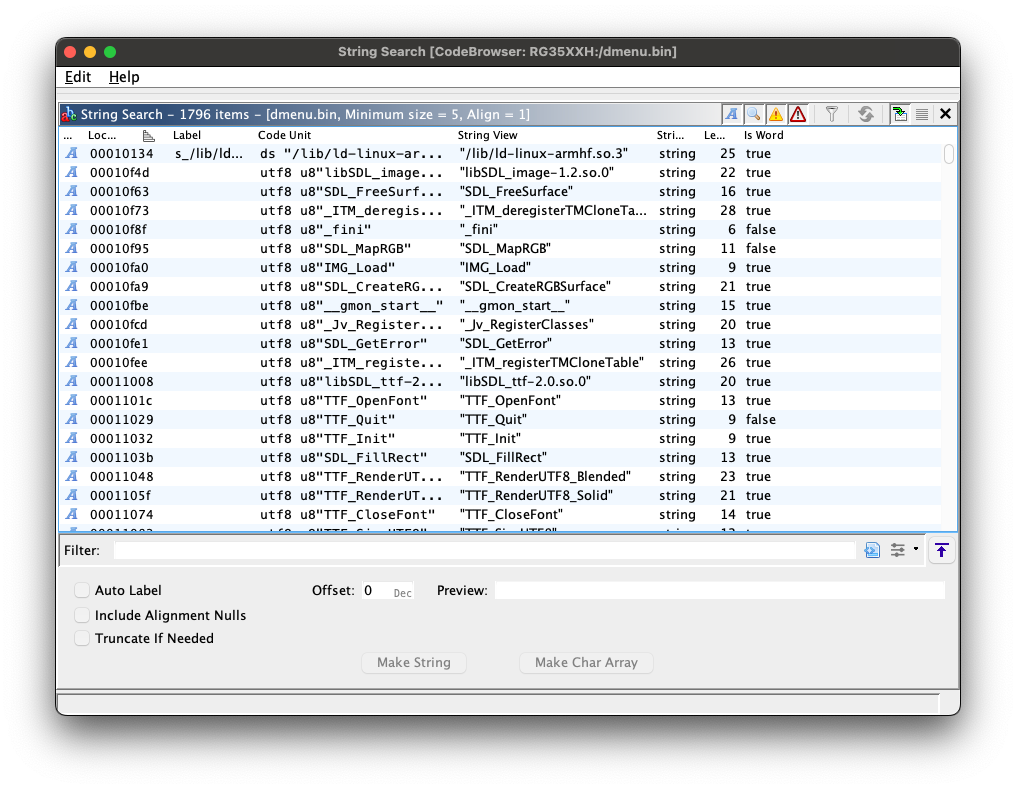
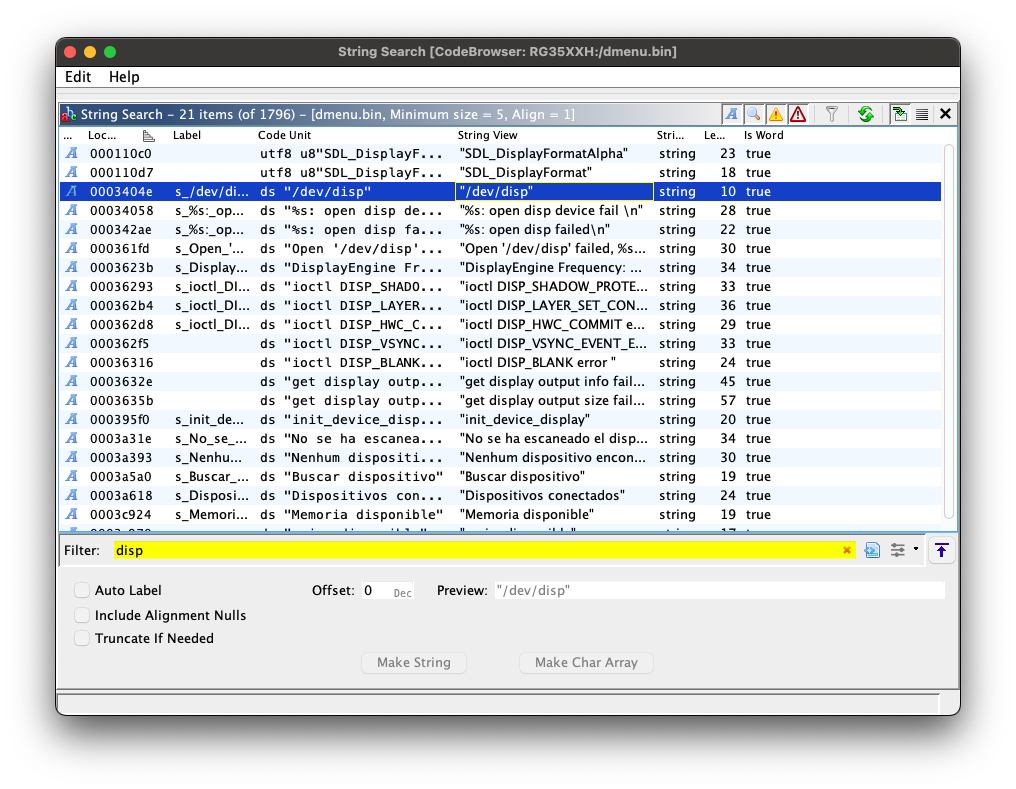
So enters Ghidra. Let's create a new project and open up CodeBrowser. We're going to then use "Import File" to load dmenu.bin. The first thing I like to do when analyzing binaries is inspect the strings. When you're dealing with unencrypted or unpacked binaries this simple step can get you very far. You can find a lot of interesting things in the strings a program might use. As mentioned before, I did already take a little peak, so I'm going to filter down to what I'm interested in before I get ahead of myself and start looking at other things.
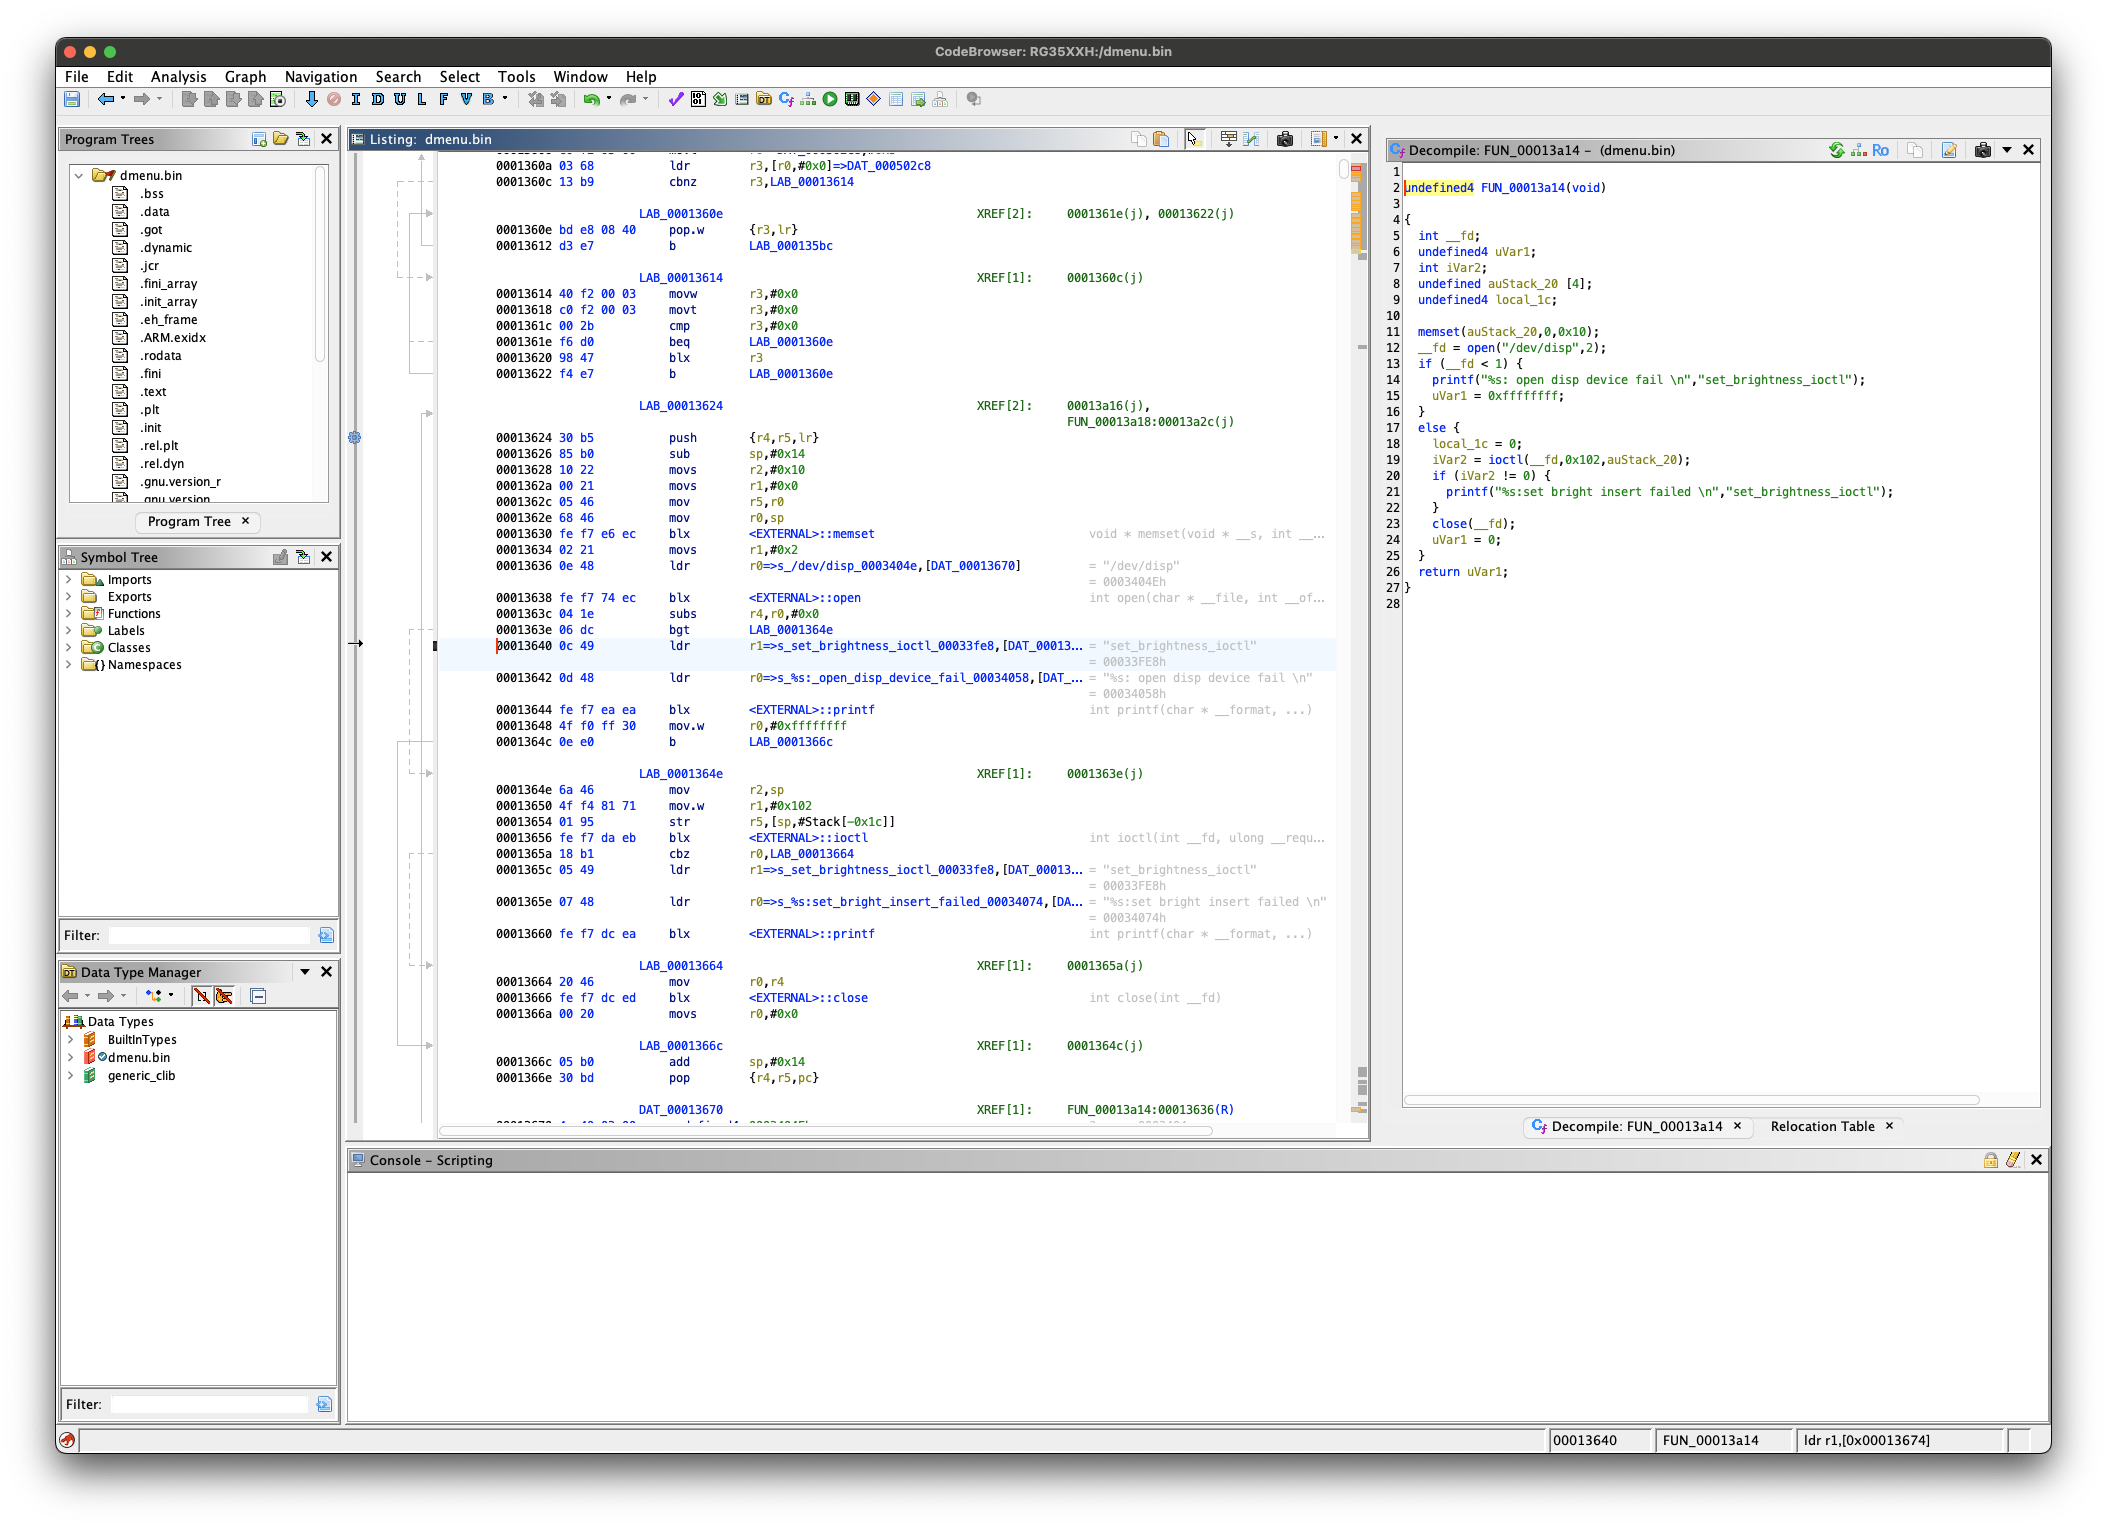
Tracing into the stock brightness control.
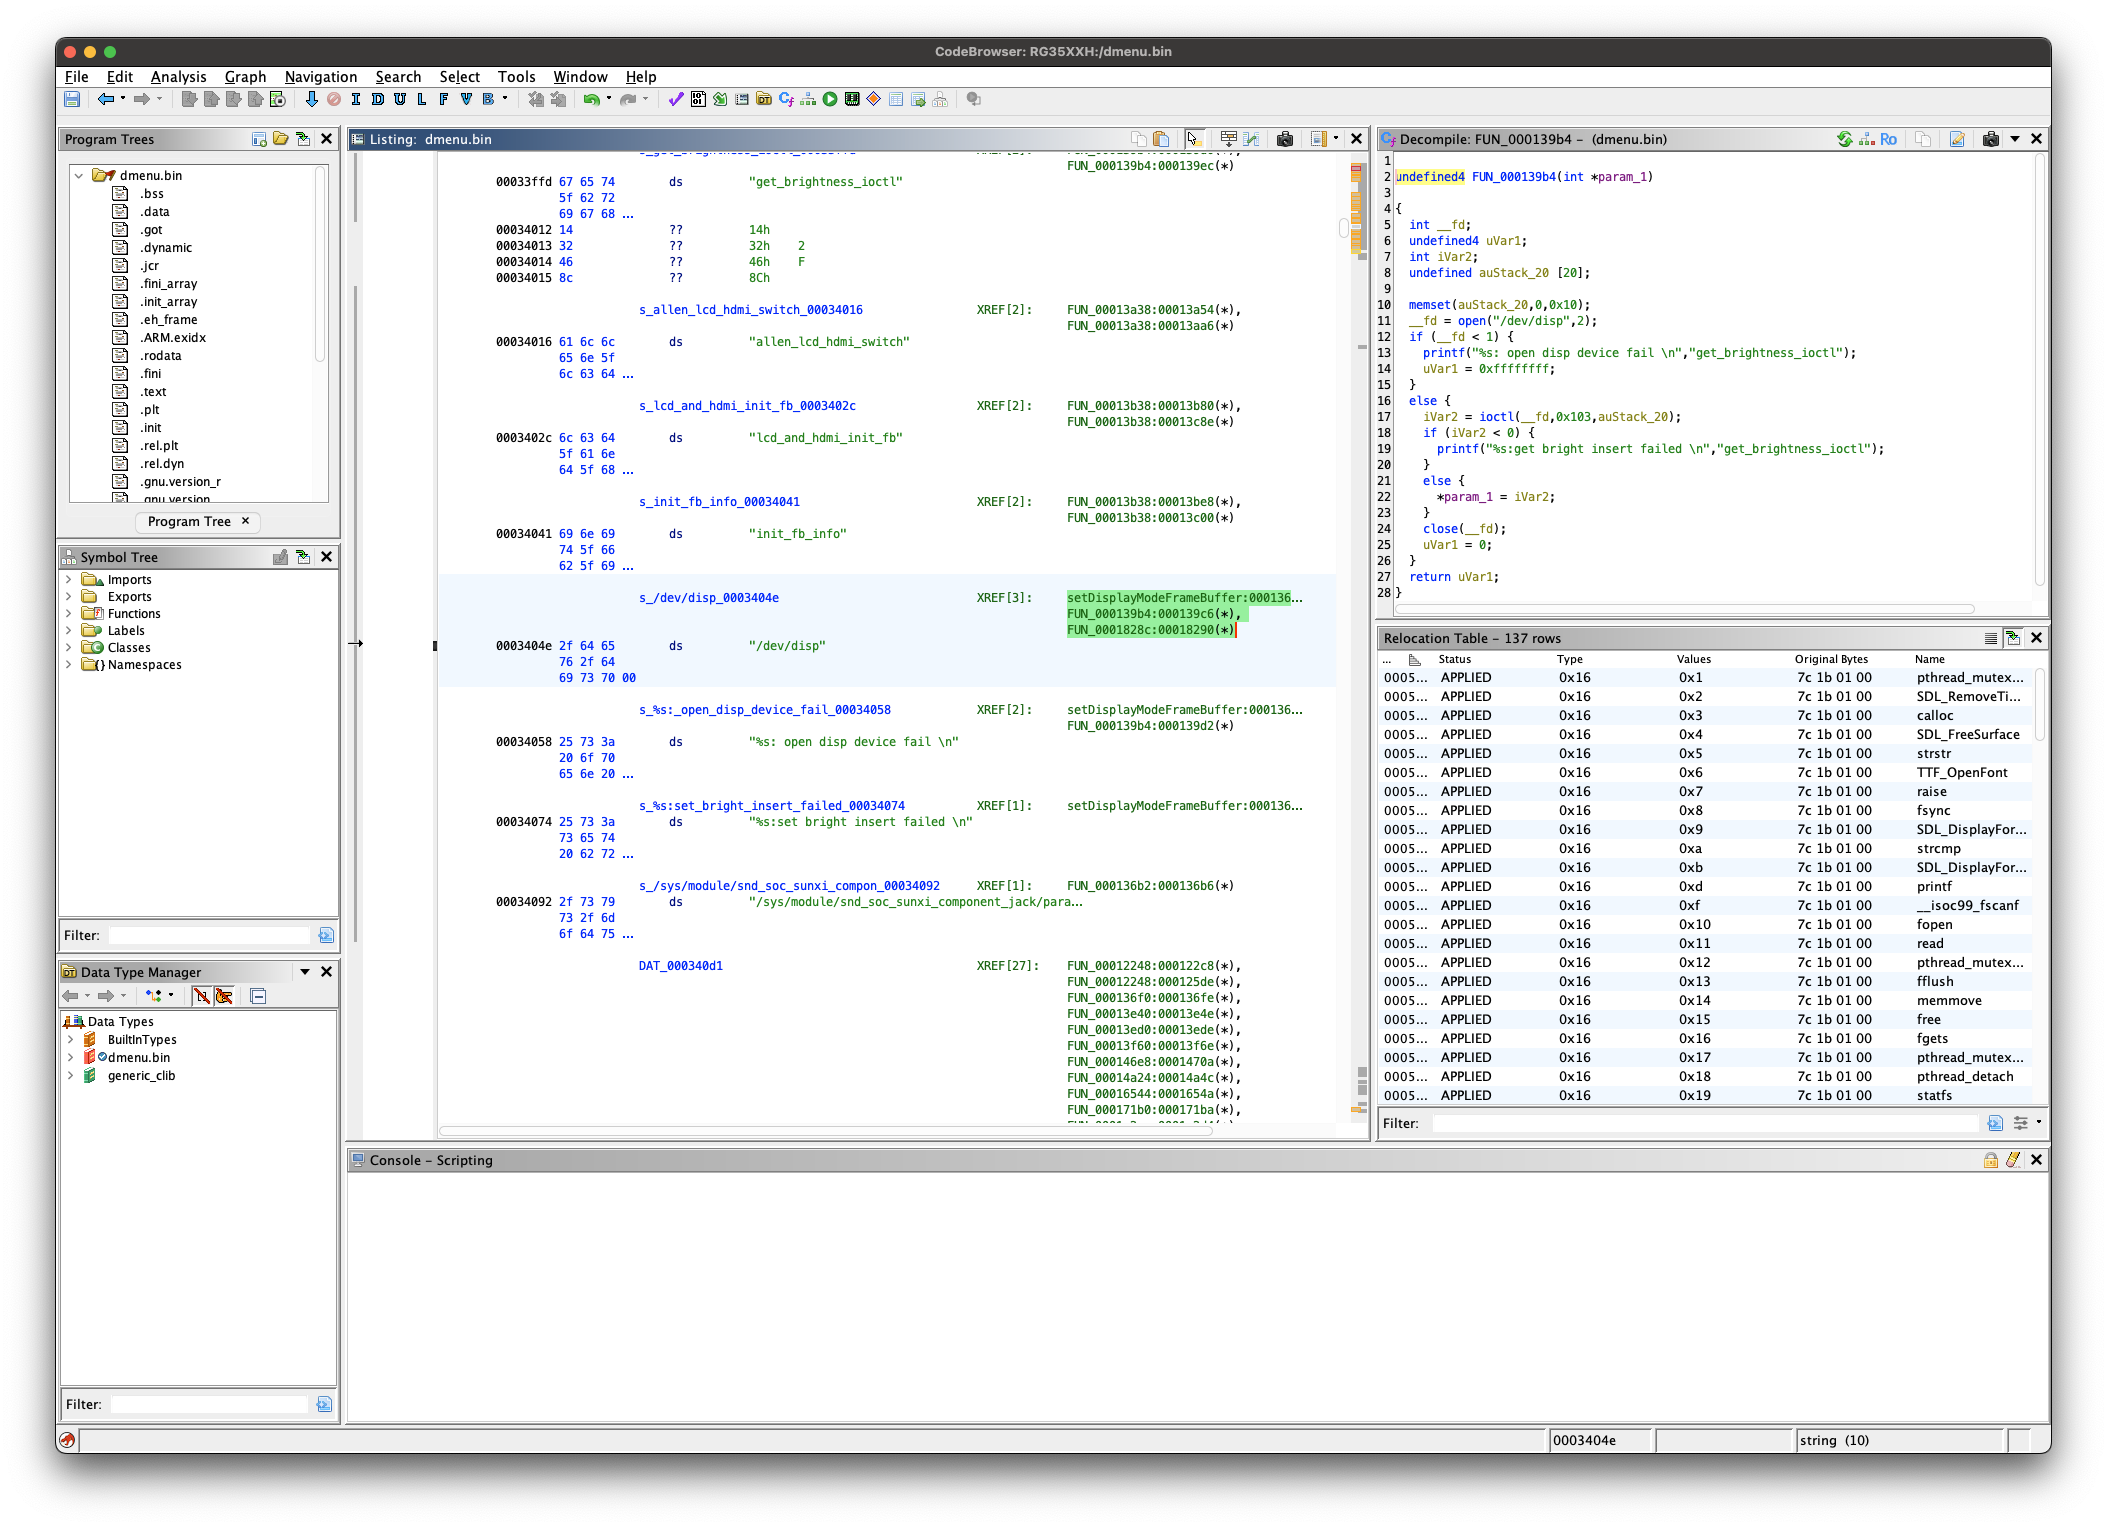
So I drilled down to what appears to be a piece of code that sets the brightness of the display. Ghidra is nice enough to provide us a decompilation view to make analysis even easier! I'm sure there may have been a plugin for that in OllyDbg, but I never had that if so! This is a dream!
So now here is where we catch up to the depths that I've gone so far before starting this series of posts. Everything from here on out is new territory. So let's look at what we have here. We'll focus on the decompilation for now, because it is just easier to read at a glance.
So it looks like we try to open a device (/dev/disp) and send it some zeroes for ioctl 0x102. It will return 0 on success and -1 on failure. So taking a little bit of a closer look I wonder if this is actually initializing the display. I'm pretty sure /dev/disp would be device-dependent (i.e. a monitor vs this embedded screen), but let's see if Google can enlighten me.
... Googling ...
Well, it seems like resources about /dev/disp point to code for Allwinner devices. The RG35XX H is an Allwinner device. Here are some resources I found for ioctl codes:
 linux-sunxilinux-sunxi
Probably not correct, but might be worth a look anyway just in case. The second link gives us (hopefully) exactly what we are looking for. According to sunxi_disp_ioctl.h we can guess that this is calling the DISP_CMD_VIDEO_SET_FB ioctl. That doesn't quite line up with the text that seems like it would output on error, but we won't worry about that for now.
I think this makes sense. So maybe this is part of initialization. Armed with Ghidra we can begin to write down what we think know:
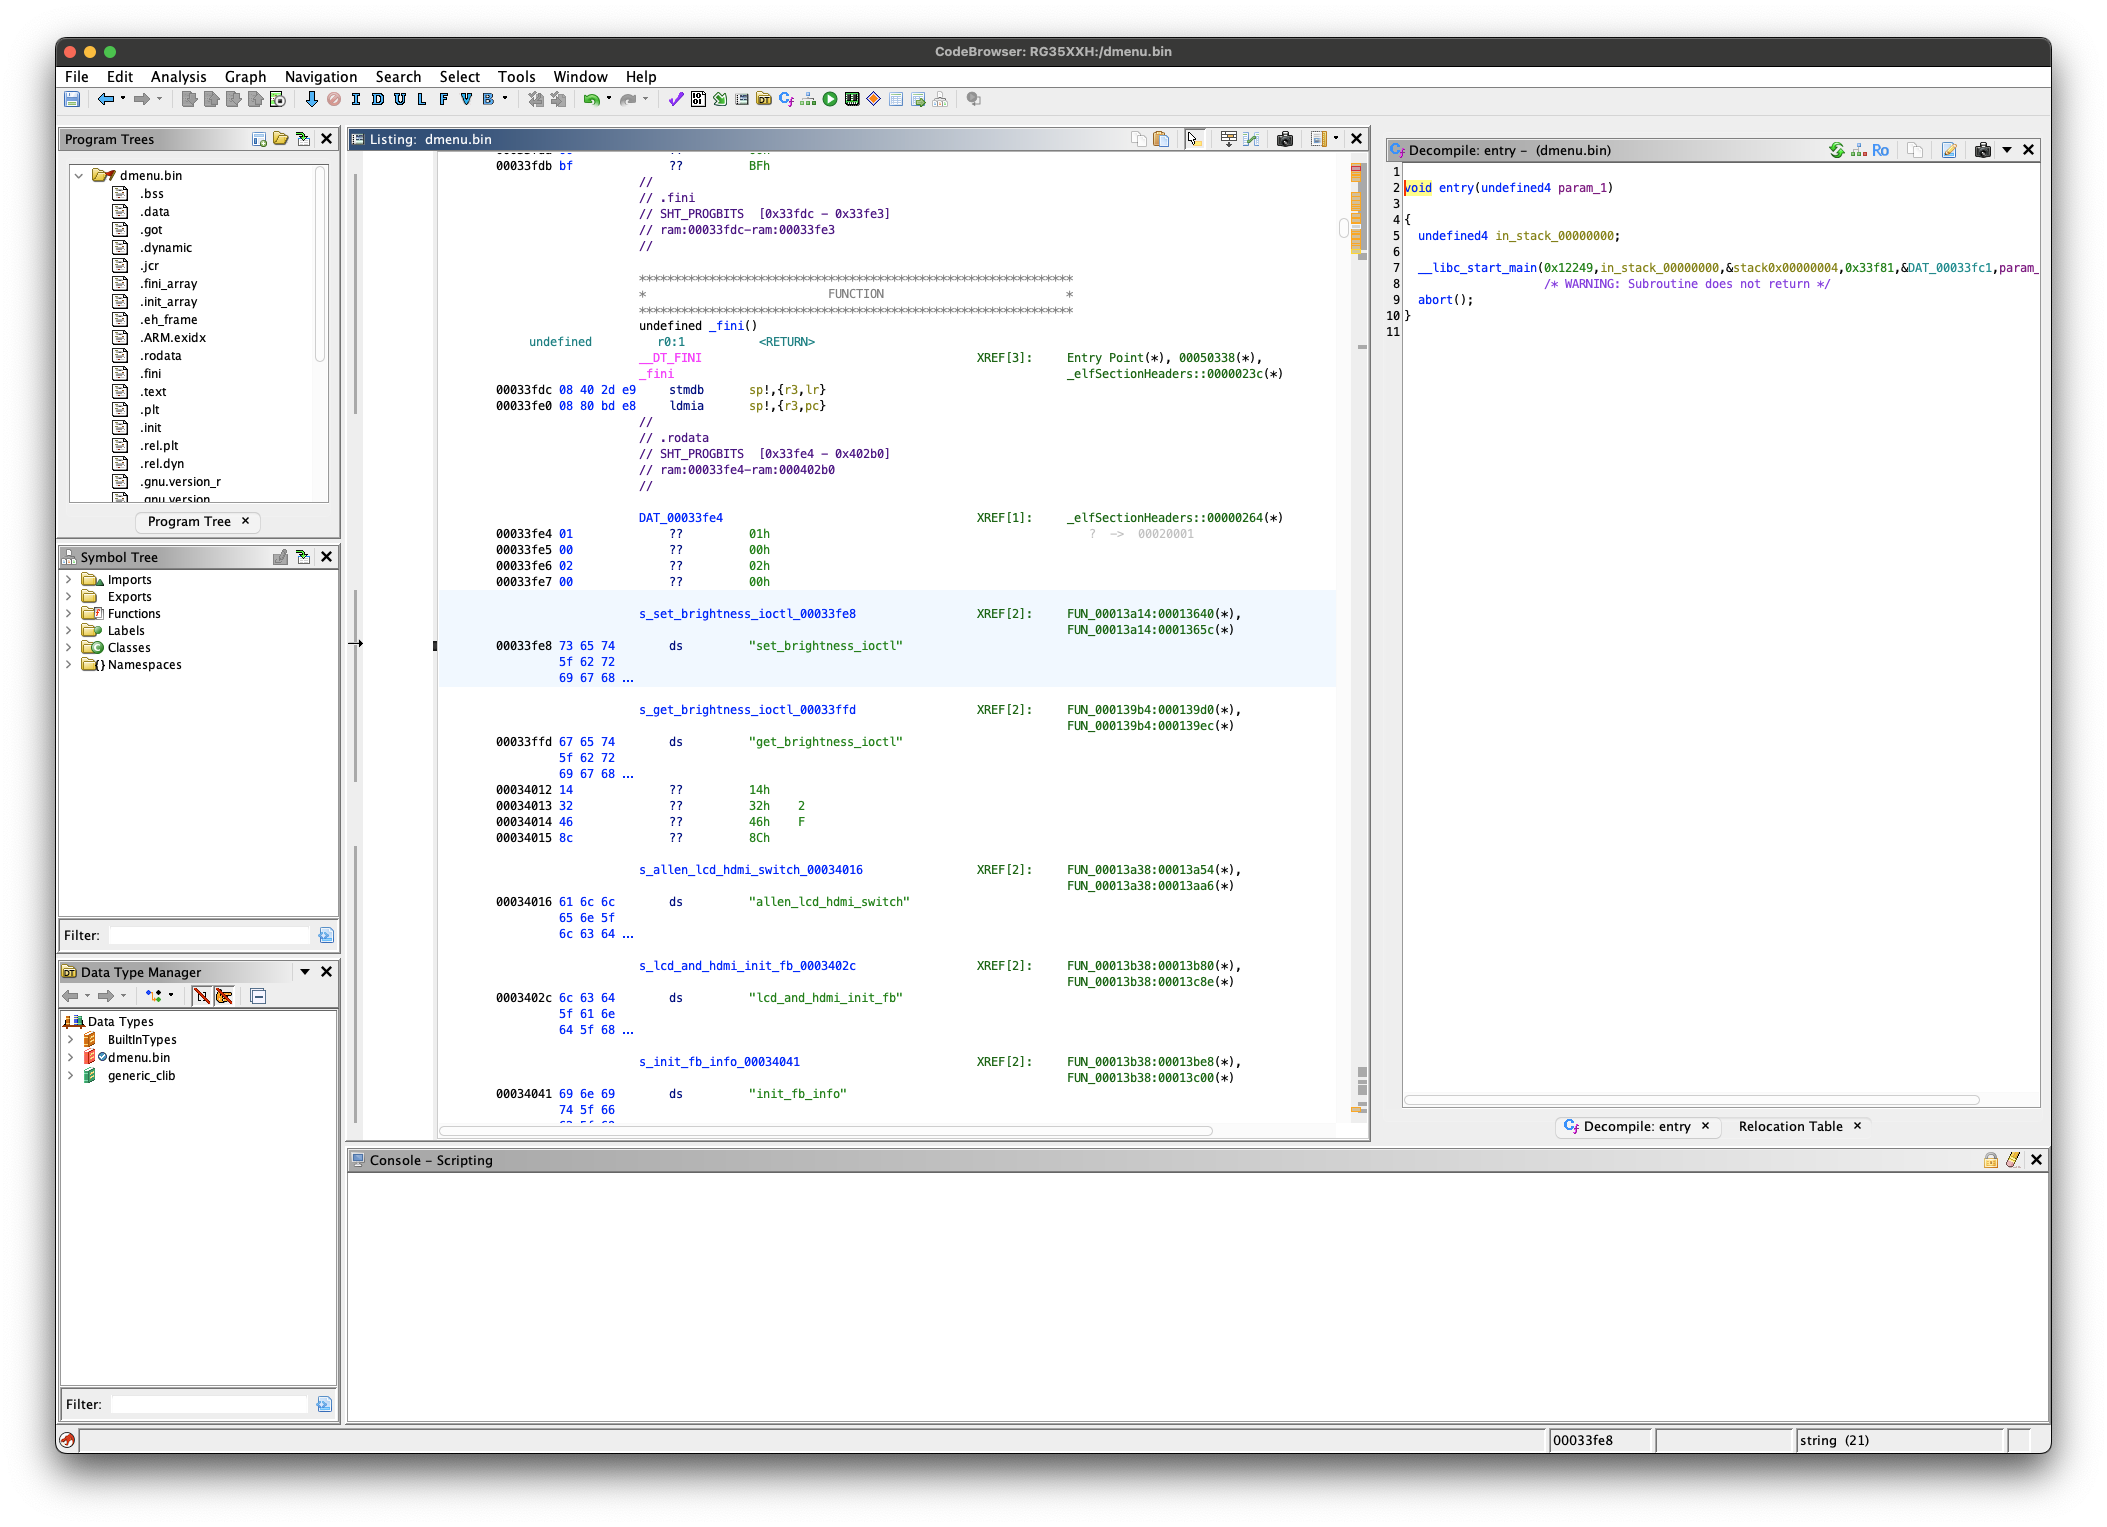
So I'm going to back up for now and see what else uses /dev/disp. To do that I'll go back to my string list, click on /dev/disp and the I can double-click on the XREFs in the Code Browser window.
A lot to digest here.
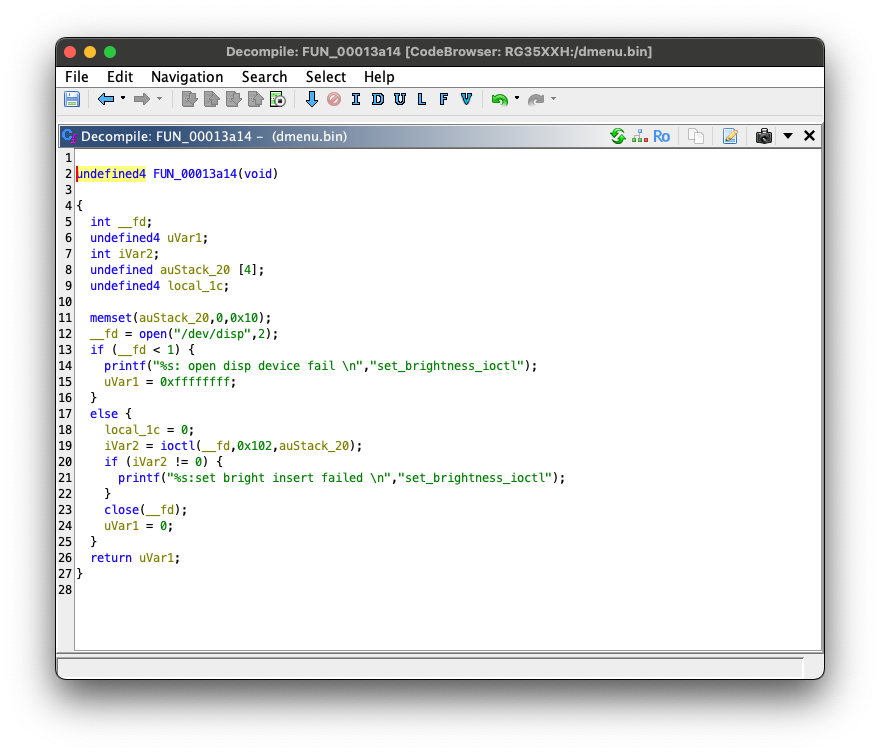
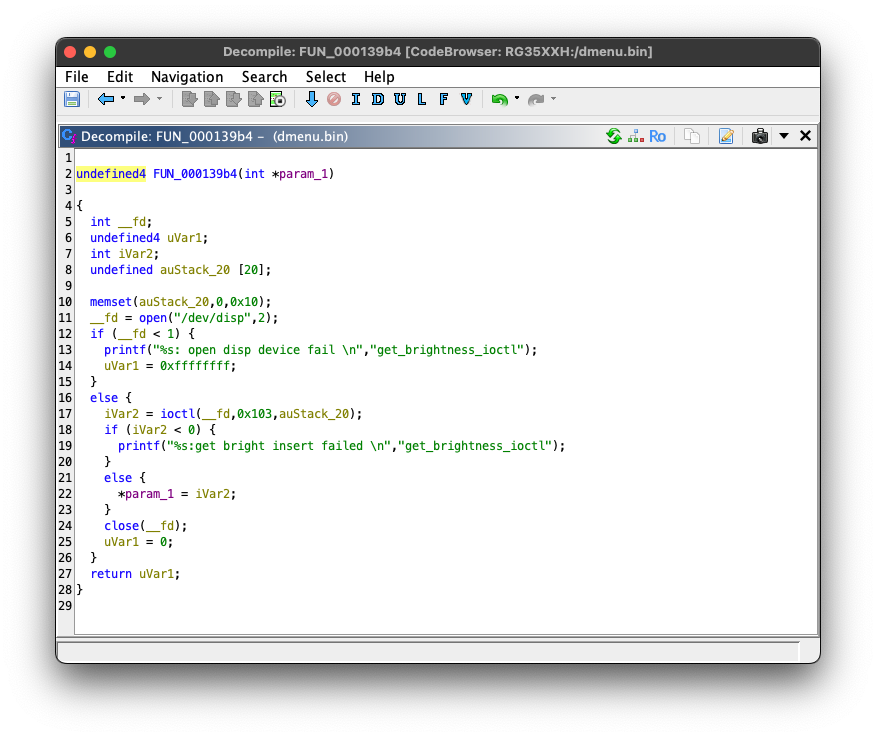
Okay, so only a couple other places to check out. If we go based on the header file we found earlier, the first function is something like getDisplayFrameId and the second one looks like it will just open the device, so I'm calling it openDisplay.
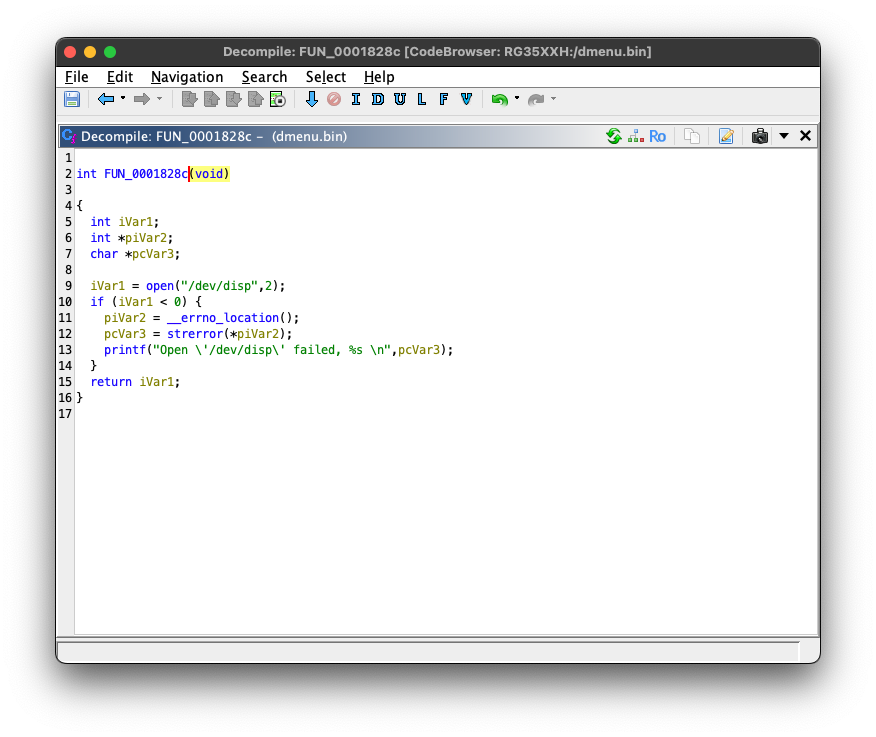
Now, the text on the printf in getDisplayFrameId is making me think that it really is to get brightness and setDisplayModeFrameBuffer would really be setting brightness.
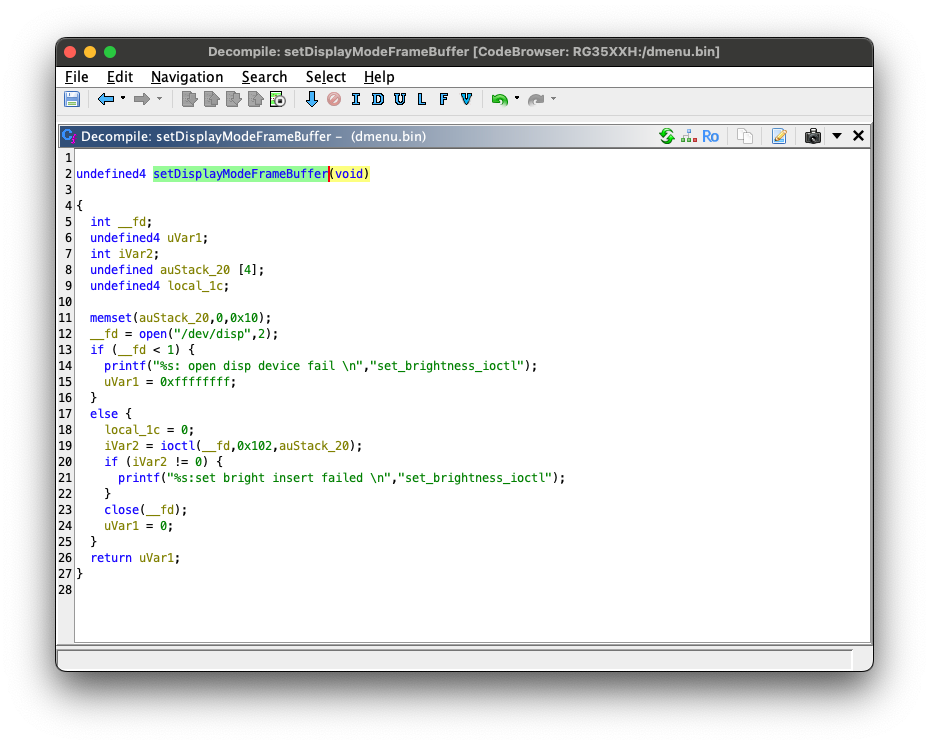
Looking around a bit more it seems like Ghidra just has a strange decompiling for the original function we were looking at (we labeled setDisplayModeFrameBuffer). Selecting a different function header in the disassembly reveals a different decompilation. I guess that's what I get for focusing on the decompilation and not the disassembly. Let's check this out.
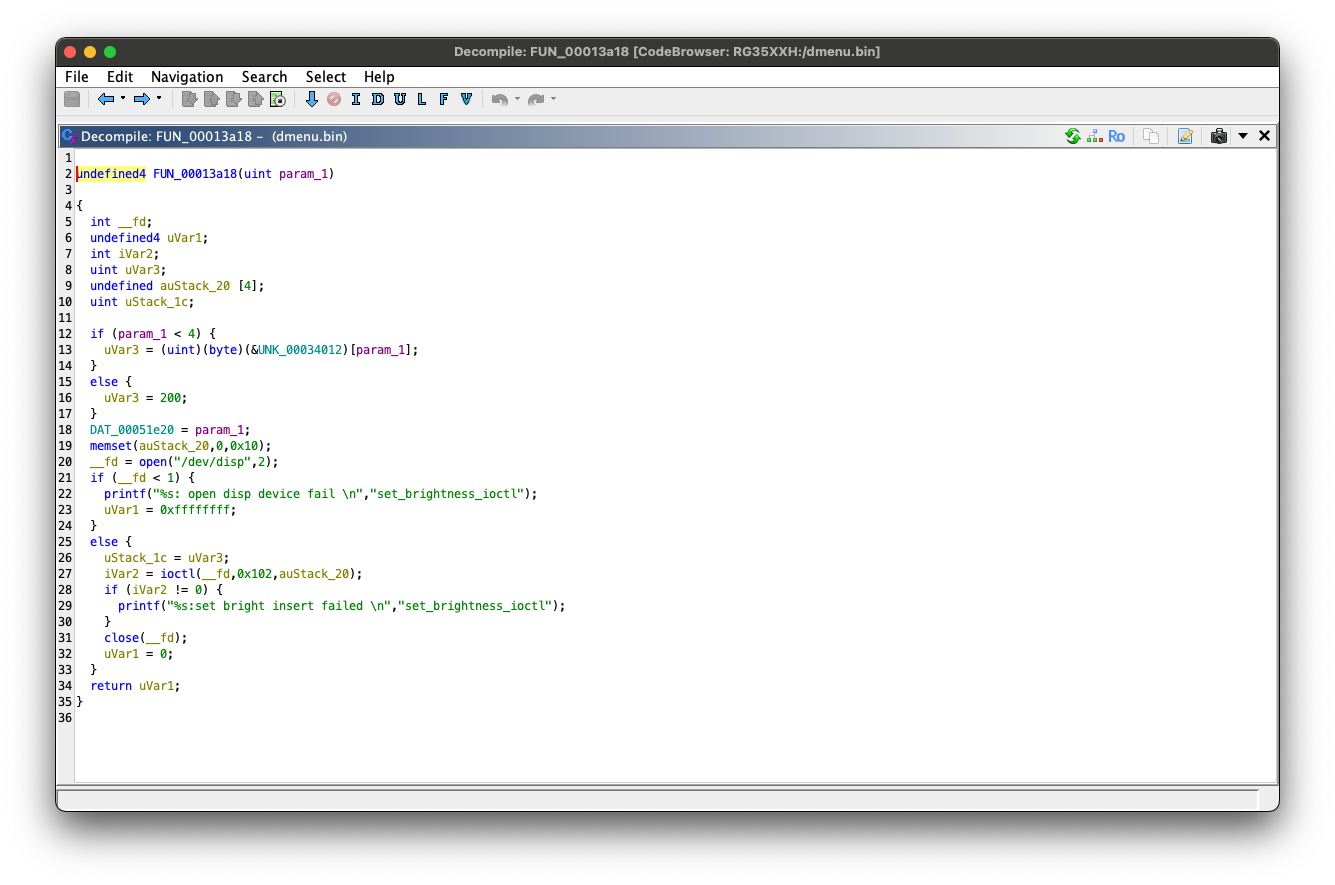
Okay, this looks more like what I would have expected for something setting the brightness. Let's try writing up our own program to do the same.
Building Go on the RG35XX H
Not that hard.
The directions for installing Go are very straightforward, not too much to do. Just download and install the package, then update our .bashrc to update our environment. A couple lines and I have Go ready:
wget https://go.dev/dl/go1.23.1.linux-arm64.tar.gz
# Official install directions
rm -rf /usr/local/go && tar -C /usr/local -xzf go1.23.1.linux-arm64.tar.gz
# Add Go to our path
echo 'export PATH=$PATH:/usr/local/go/bin' >>~/.bashrc
# Reload our current shell env, to include our Go path
. ~/.bashrc
# Should give us our expected version
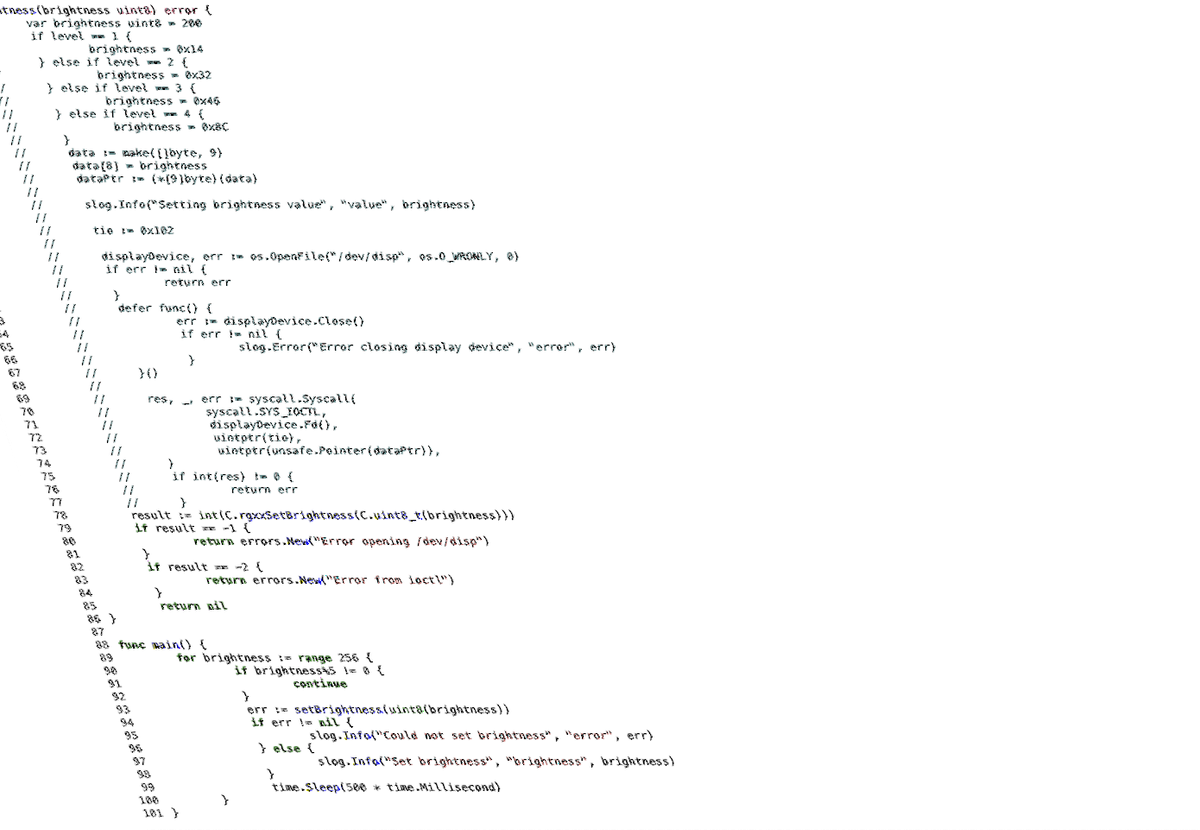
go versionI'm not sure how to do ioctl in Go, so I'll Google that, but otherwise we are just rewriting this decompilation into the corresponding Go. If we peek back at the disassembly we see it actually pulls some values from a table to send, so we'll grab that table as well to start.
After an adventure trying to get ioctl to work properly in Go I eventually just broke down and wrote it in C. I found that I could set whichever brightness value (0 - 255), not restricted to the original table given in the disassembly.
My "Eureka!" moment
I was able to get something working with Go, but it didn't use the actual supplied brightness value so I'll need to debug more to figure out exactly what happened. I knew Go could interface with C, but not exactly how. I then learned that Go has pretty cool functionality to include C code. Here's my end result, with my half-functioning Go version commented out in there still.
What's next?
More reverse-engineering.
It's hard to say exactly what will come next. This was a great experience though. I already learned a good amount. I learned that I can trust the strings in the binary, how to interface with /dev/disp, and little bit about how to interface C and Go code. Some things on my list:
- Poke around the menu binary some more
- General system maintenance (Like updating those apt sources)
- Implement Bluetooth audio if possible (Maybe already working? Mine did not seem to connect when I poked around a bit ago.)
- Eventually build a new shell (menu).
- Setup CI to build images with my changes from the stock image.
So a decent list already, and I'm sure it'll only grow.
Until next time!